Thursday, September 28, 2006

It Makes Mosaic Painlessly And It's Absolutely FREE!

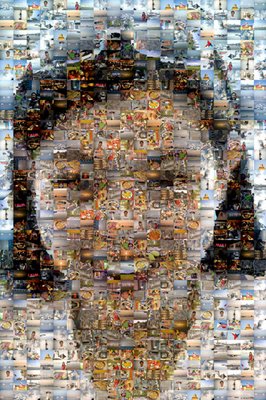
Original photo by Andrew Villasis (Boso). The mosaic tiles used are all the pictures I took during my last visit to the Philippines last April 2006.

Have you ever thought about making a mosaic before of your favorite photo from a recent vacation using all the other pictures from the same event as tiles? I have. In fact I tried doing one manually with Photoshop. How difficult can it be? All you need is to reduce the size of each photo, stick them all together and then put the main photo in another layer and adjust the layer transparencies accordingly and you got yourself a mosaic!! Wrong!! I didn't got the effect the way it should be.

Recently, from one of the photography magazines I've read, I discovered AndreaMosaic and the best thing about it is it's absolutely FREE for download. I wouldn't go into details on how to use it because I'm sure you can easily figure out how it works and how to use it. The download comes with instructions in PDF format. Below are samples of some mosaics I have done using the software. Obviously, the more tiles (small pictures) you use, the closer your mosaic will appear compared to the base image. However, I must tell you that after you click the "Make Mosaic" button, you may want to make your self a cup of coffee because it will take from anything between 10 to 60 minutes before it can finish your mosaic.


You can download your copy of ANDREAMOSAIC for free at http://www.andreaplanet.com

Have fun!

Cheers,

alexdpx

Wednesday, September 27, 2006

PORTABLE STORAGE PROBLEMS???

We all experience storage capacity problems but having multiple storage cards for your camera could be a little pricey and adds clutter to your camera bag.

But now there's an alternati
ve to all your digital storage requirements and its called DIGIMATE.


The DIGIMATE is a small portable storage device that could accomodate a 2.5 inch Hard Disk (not included) similar to the ones being used on Laptops regardless of capacity. You can Copy/Backup your digital files from your memory cards (CF, SD, XD, Memory Stick/Pro, MMC and SMC) without the use of a Laptop or a PC.

Transferring your data from the DIGIMATE to your PC or Laptop is easy since it features High-speed 2.0 USB Connector.

The DIGIMATE (with a 40gig HD included) will not cost more than a High-end / Branded 2gig CF card.

For more information regarding the DIGIMATE please see specs below:

Features/Specifications:

* DigiMate II-Plus USB 2.0 9-in-1 Smart Portable Storage

* General Features:
* USB 2.0 interface (USB 1.1 compatible)
* 480 Mbps maximum transfer rate
* Accommodates 2.5-inch (notebook type) hard drives (not included)
* 2" LCD
* Standalone Copy/Backup contents of flash memory cards to DigiMate II no PC required
* Supported Flash Memory Cards:
* Compact Flash card Type I/II
* MicroDrive
* SmartMedia card
* Memory Stick
* Memory Stick Pro
* Secure Digital Card
* MultiMedia card
* XD card

* Power Supply:
* Internal Lithium-ion rechargeable battery
* Charging times: 3 hrs (approximate)
* Battery Life: 2 hrs
* Power Adapter (110-240V)

* File System Support:
* FAT 32/16 support for hard disk drive
* FAT 12/16/32 support for memory cards

* Regulatory Approvals:
* CE

Package Includes:

* DigiMate II plus Smart Portable Storage
* AC Adapter (110-240V)
* USB cable
* 3-inch CD with Windows 98SE USB device drivers
* Mini Screwdriver w/screw pack
* Soft Carrying case
* Manual

Additional Information:

* Notes:
* 2.5-inch Hard Drive NOT included

* Product Requirements:
* Windows 98SE/Me/2000/XP
* Available USB port
* CD-ROM drive (to load driver)
* 2.5-inch Hard Drive


Top 10 Mistakes a Photographer Makes

I recently received an email from a friend. And after reading it, It made me realize again that I have been commiting the same mistakes over and over again eventhough I know all about this already.

So I'm sharing this so that everyone gets a chance to be able to review once in awhile the Top 10 Mistakes a Photographer makes.

********

Everyone makes mistakes. Even Ansel Adams through some of his negatives away. But what causes those mistakes? They are usually caused by lack of concentration. So here's a list of mistakes that many photographers make. By studying them, you can avoid them.

1) Blurry Pictures
Blurry photos are usually the result of camera shake. The simplest way to remedy this problem is to buy and use a good, sturdy tripod. If you can't shoot with a tripod, remember to use a faster ISO on digital cameras or faster film on film cameras. This allows you to increase your shutter speed. The faster the shutter speed, the less likely you are to suffer from camera shake. A rule of thumb for handholding is to use a shutter speed that is 1/lens focal length or faster. In other words, if you're shooting a 200mm lens, you need 1/200th second or faster. Don't forget to compensate if you shoot digitally. If you use a 200mm lens on a Nikon D100, it is the equivalent focal length of 300mm, so you will need to shoot at 1/ 300th of a second if you want to handhold.

2) Contrasty Pictures
These come from high contrast lighting situations. Learn to recognize them. Photographing in the forest on a sunny day is an example of a high contrast situation. Photographing at Noon on a bright, sunny day is a high contrast situation.
Contrast can be mitigated with diffusers and fill-flash, depending on the circumstances. Usually the best solution is to wait for better conditions. Another trick is to shoot with low contrast film. Ko dak's B&W Portra 400 is a good film to use in high contrast situations. It has nine stops of tonal latitude and that tends to compress the contrast ratios in the scene.

3) Underexposed Pictures (prints)
Underexposure often results from letting the camera make all the exposure decisions. Remember, the camera's meter wants everything to be medium (or gray.) If you do use the auto exposure functions, one common mistake comes from using auto exposure compensation and then forgetting you've done so. Make sure that you get enough light into the scene before you press the shutter. With print film, it's better to overexpose than underexpose, so when you bracket, do it to the high side, i.e., plus one stop, plus two stops.

4) Overexposed P ictures (slides)
Like underexposure, overexposure can result from letting your camera make all the decisions. With slide film, overexposure means blown out highlights and that means lost information. Basing your exposure on shaded or dark areas and letting the camera set the exposure is a formula for overexposed slides. Look for something medium to meter from or, better yet, meter the highlights. Just make sure your highlights won't be more than two and one half (2 ½) stops lighter than medium.
Since overexposing slide film is bad, bracket your slide film to the low side, i.e., minus one stop, minus two stops.

5) Red Eye
This is a common problem resulting from on-camera flash. Move your flash off- axis. Use a flash bracket and connecting cord. You can also bounce the flash off a ceiling or wall. You can also use remote flash triggers to fire a flash that is mounted on a stand or anywhere else, as long as it is not on camera.

6) Lens Flare
Flare occurs when direct light hits the front element of the lens and light starts bouncing around inside the lens. This causes the light to reflect off all the elements. This can reduce contrast and make your pictures look "hazy". Most commonly, it results in a series of round highlights across your image. Be sure to use a lens hood to help prevent this. Sometimes you'll need more than a lens hood. Try using your hand or a hat to shade the lens. If someone is with you, ask him or her to stand so that they cast a shadow on th e lens.
Sometimes it's hard to detect lens flare when looking through the viewfinder; using your depth of field preview button will make this easier.

7) Obstruction
Be on the lookout for intruders trying to make their way in to your pictures. Branches, out of focus grass blades, telephone wires"¦.all these and more can act as distractions.
Most viewfinders show only about 92-95% of the image. Keep that in mind while photographing. You may want to try shifting your camera around to see what's at the edges.
Some intruders are hard to see in the viewfinder simply because they're too cl ose and not in focus. When you get your pictures back you see things you didn't see before. Remember, you're looking through your lens at its widest aperture, thus the shallowest depth of field. Some things won't be in focus. Use your preview button and you'll see any intruders. If you don't have a preview button, try focusing throughout the range of your lens to see what may show up.

8) Vignetting
This is what happens when items encroach on the outside edges of your camera lens' field of view. It's often caused by stacking filters, or by adding lens hoods to lenses that have filters attached. Other accessories, like filter holders, can also cause vignetting. If your viewfinder shows less than 100%, you may not be able to see this happening. Run some tests. Put on all the different filter/hood combinations you can think of a nd photograph a blank wall. Take notes and look at your images when you get them back. The depth of field preview button will also help reveal when vignetting may be a problem.

9) Color Casts
Color casts can result from using the wrong film, outdated or spoiled film or shooting in deep shade.
If you use daylight-balanced film like Velvia or Ektachrome Elite and shoot indoors, you could get some very strange results. Under tungsten lighting, regular lamp light, you'll end up with a very warm color cast. If you're shooting under fluorescent light, you'll see a greenish cast.
If the problem is the wrong film, the solution is to use a color-correcting filter. For tungsten, use a filter in the 80 series. These filters are blue and will balance out the yellow of tungsten light. For fluorescent, use an FL filter. If you're using flash indoors as your only source of light, you shouldn't have a color-cast.
The other solution is to use the correct film. Tungsten balanced film is made for use under tungsten lighting and will result in the correct colors being recorded.
Shooting in the shade on a sunny day will result is a bluish cast. After all, the predominant light source is the blue sky. Use a filter in the 81 series. These yellowish filters will balance out the blue.
For outdated film"¦.well, good luck. You get what you get and the only way to correct color is after the fact, either at the lab or in the computer.

10) Tilted Horizons
Off-center or tilted horizons are probably the most common mistake that we all make and there are several ways to quickly solve this problem. Our favorite is to use a focusing screen with a grid etched into it. These are available for many cameras; check your manual. Two cameras, the Nikon N80 and the Nikon D100, even have grid screens that you can turn on or off as a custom function.
Another solution is to simply step back and see if your camera looks level to the world. Then take another look through the viewfinder. Sometimes we need to approach the viewfinder from an angle because of the camera position. Taking another look through the viewfinder with your head level w ill help too.
One of the easiest solutions is to buy a bubble level for your camera. These levels fit in the flash hot shoe. This way you'll always know that you're level.
There are times, however, when your camera may be level but the horizon will appear tilted. This apparent tilting results from receding shorelines; the closer parts of the shoreline are lower in the frame. Just be aware of this phenomenon so you can decide if it's something that will be a distraction or not.

CONCLUSION
Whether you are a seasoned pro or a new shooter, these ten problems can creep up on you. So review this list often and make a mental checklist to use every time you photograph. You wi ll notice an immediate increase in the quality of your images

Article Copyright 2005, Scott Bourne - Photofocus Magazine


FPClogoFAhor

Tuesday, September 19, 2006

FPC Party Photos

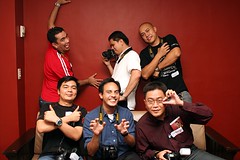
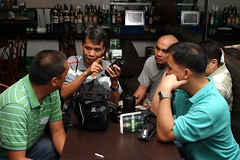
Here are some of the photos from the FPC Party last September 14, 2006 held at Nirai Japanese Restaurant Greenhills San Juan.

The Few and The Braves Short Tutorial

Top: The Few and the Braves - Nikonians Group Picture

Bottom: Mr. Macro Master (Rey Nocum) giving a short tutorial to the members during the earlier part of the night.

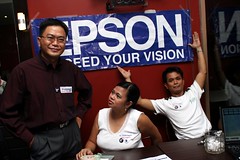
Sponsored by Epson IMG_5218

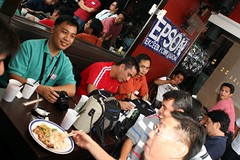
Top: Epson Philippines as one of our Major Sponsors.

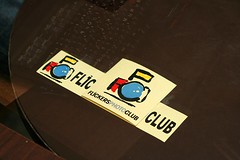
Bottom: The Flickers Photo Club Bumper Stickers.

IMG_5249 IMG_5278

Top: From L to R (Left side Top): janzedrik, tipoy, stitch and rareimages
From L to R (Right Side Bottom): Uma Nota, Rey Nocum, (Not sure who's the hidden guys) and jolengs.

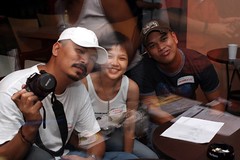
Bottom: Models from L to R: Karz, Dindi and Micha

IMG_5293 Syke, Small Wonder and Jozexit IMG_5265

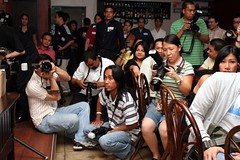
Top: FPC members in action.

Mid: Syke, small wonder and jozexit

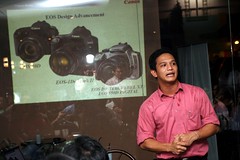
Bottom: Major Sponsor Canon Philippines presenting their products.


Shocked like Hell FPC Button Pin

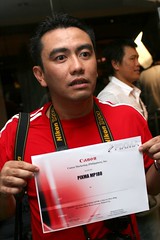
Left: The winner of the Canon MP180 Pixma Printer. None other than Mr. Tipoy. Seen in this photo still shocked.

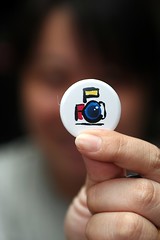
Right: The Flickers Photo Club Button Pin

Modeling StintJohn Edward
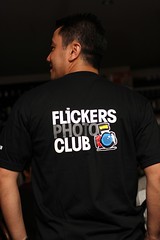
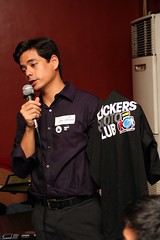
Left: The Flickers Photo Club T-shirt modelled by Mr. Tipoy.

Right: MC of the night, Mr. John Edwards.


If you would like to see more photos. You can view the slide show. http://www.flickr.com/photos/tags/fpcniraiparty/show/

The Unveiling of FPC

The crowd started to thin out, as the new faces came in while the Club members, their guests and the models completed the exodus out of Nirai. The sleepy lightsman of Aperture Trading who pressed his head against the glass wall while sitting beside the studio light he was supposed to man—oblivious of the hubbub that the eager members shooting the models—finally got his head on a pillow, I suppose.

The Canon representative who did a no-microphone presentation with a hoarse voice over a hall packed with camera enthusiasts must, by now, be getting his throat lozenges or soothing ale. Archie, the restaurant owner, was now busy attending to his usual customers, conversing with them on the couches the models posed on for member-photographers jockeying for the prime positions. No doubt, the night was settling into its “normal” mode.

But we, the organizers of the party, were still there inside Nirai, congratulating one another for a smashingly successful event. We simply had no idea the enlisted members will live up to their word that they will attend the party we dubbed “the Unveiling of FPC.” We were expecting about half will not be able to come, but alas!, almost all were there to meet, eat meat, talk and shoot! And what a garrulous bunch, talking “until their mouths frothed,” as one member later figuratively put it online!

How was this gathering of 55 friendly photographers brought into fruition? Well, the answer may be traced to the several “eye-balls” of members of the popular photo-sharing website, flickr.com—from the first studio shoot and dinner, to the poetic sunset of Manila Bay, to the raging false falls of Wawa Dam. It was during this latter photo-shoot and meeting on May 21, 2006 that six core members formally organized and named the group “Flickers Photo Club” (the Club). After that, Pat Hocchuan (flickr name, Hocchuan) went on to create the Club’s online group—
http://www.flickr.com/groups/flickrphilippines —where we can attract members, and engage each other via the discussion threads.

Last June 23rd, noting that the online club membership was near 300, John Edward Taca (John Edward) proposed a party on a discussion thread, and others went on to fuel the interest, proposing dates and venues and activities during the party. It died down a bit, but Andrew Villasis (Boso) pointed out that we should keep our word to develop credibility. Thus, preparations went on as early as a month before the event, with the nine (9) online group administrators—which includes the six present at the Wawa photo-shoot—doing the legworks.

First we visited the proposed placed owned by a Club member, Archie Simtoco (Archie0222) – the Nirai Japanese Restaurant at the carpark area of the Greenhills Shopping Complex along Ortigas Ave., San Juan. We met there for a dinner and planned the rough details of the party. It was agreed that we should send personal invites to the member via email to boost the attendance. Various tasks were assigned to specific admins. Andrew clenched the support of Canon who promised to provide on-site printing, lenses on loan during the model shoot, and a photo printer as the grand raffle prize, in exchange for spot and time to promote their products. Ronnie Ragonton (Ronrag) engaged Epson for the many items to be raffled off and given away at the party night. Archie got the sponsorship of Premium Wines and Spirits for the night’s drinks. Perry Chua (PowerPee) engaged the support Aperture Trading early on.

We planned the party to be not the usual “gather-to-eat-and-talk” type, which would look like we did it just to please the members. Rather, we aimed at introducing the Club and the members with a “big bang,” much like when runners of a race burst into action at the loud sound of firing gun. So we thought of button pins—not one, but two designs, car stickers, t-shirts, and even ball pens, with the FPC logo. Igor Maminta (Igorms) finalized the logo design, which, by the way, underwent an evolution caused by the critical eyes of the admins. The logo was then printed on the button pins and t-shirts, assigned to Edward Chuasiaokong (Ed’s) and Perry, respectively.

The model shoot, though, was there in the plan right from the start. But the models we wanted were either not available or not “free.” Thus, it was decided that we should just pay for models and get value for what we will pay for. We met once again at Pier1 in Quezon City to pick the models from a list and photos that Andrew brought with him, over some San Mig Lights, peanuts, pasta, and sizzling “sisig.” To spice up the event even more, we injected a secret (members not aware) photo contest and we scheduled a final meeting at Pat’s place the next Saturday to decide on the winners and finalize other details of the party activities, like the registration and program, which was given to Ed to firm up.

In the confines of Pat’s office, we strained our eyes browsing through the pool of 6,000+ photos, looking at photos fit to win the four categories: Landscape, Black and White, Portrait, and Macro categories. And then the ensuing debate on who will win the top spot among the nominees, while on the side, Igor showed us his creepy ghost photos. Then he and Edward went on into the dark office bays for flash lessons and practice. We went home late in the evening unaware of the incoming torrent and so went out of our “war room” into a lot of rain, topped by a flash flood that made the streets lakes and rivers, and our vehicles, amphibious metals on rubber floaters. We named the flood “Bumatay Lake,” after the name of the first street we waded on half-way and backed up from. But we went home with FPC logo on car stickers as a consolation.

We also figured we should let the members have the priority at shooting the models during the party, and we as marshals controlling the activity. Thus, we decided to meet again at DPI Photography Studio to shoot the models for ourselves and post the photos later as party teasers. We guess that drummed up the last enlisters for the party. Anyway, the final list of attendees counted close to 60 the day of the party. Pat is just a panicky guy or is a consummate organizer! Because, a day before the party he, acting as the overall coordinator, was texting us to remind us to make sure everything is set. I was tasked to get the giveaways from Epson and bring them to the venue.

My wife and I arrived at the venue along with Estan and Roy, two members who are from Makati, hitching a ride with us to the venue. Alas! In our excitement, I forgot to drop by Epson to get the giveaways. Fortunately, when we called John Edward, he said he could drop by to bring the goods himself. At around 5:15, we were at the venue, and we thought we were the earliest to arrive! Kuya Ronnie was already there sitting at a table outside the main hall, puffing like your usual urban professional savoring his success. He is a lawyer. We were settling down on our registration table when Janzedrik, a member, arrives. Then Neil Vicencio (Neiltot), and admin. Neil helped organize the model shoot and as main marshal, made sure everyone who wished to shoot had his opportunity. Soon, before 7 pm, others started pouring in and after some time, it became impractical for me to take a photo of everyone who registered, which was my plan.

Soon the dining hall was packed with bubbling photogs. Flashes of light from their cameras attract the attention of passersby and patrons from adjacent establishments. The studio lights were brought in and were immediately setup, the models arrived and the flashes became even more tightly spaced. Even the sponsors of the wines and spirits brought their pretty promo girl to the delight of the party-goers! They would call the attention of the girl, not to ask for a drink but to have her photo taken!

We setup a projector and against the wall outside, we showed a slide presentation of how the club came to be formed—a montage of photos from the meets, from the studios to the concert halls and the Manila Bay, as well as parties coupled with fashion shows. John Edward’s time to host the formal program came and he fired along, bumbling but coming back funny, delivering some punchy puns and engaging the members who were at the same time eating. The Canon representative was given time for a presentation, speaking to a crowd of mostly canon users were more or less already familiar with the products, with a hoarse voice and he had to shout a little because the microphone cord isn’t long enough to reach his position, which was beside our registration table near the entrance.

Raffle prizes were drawn. A highlight of the program, of course, was the awarding of the winners of the surprise photo contest. You can view the winning entries on this page:
http://www.flickr.com/groups/flickrphilippines/discuss/72157594284862591/. The Pixma printer that Canon brought for the grand raffle prized was won by Tipoy, a Nikon camera user!
A little while more and the studio lights went on and the hall was instantly on its feet! The order of the shoot was given—in timed batches so that everyone would have the opportunity to be close to the models. At first the batches were kept. But soon, same faces appeared on each batch! But since no one was complaining, the shoot became a free for all, with just the exposure of the models being timed. Tod Polson, our only foreing guest brushed shoulders with the local photogs to get a good shot at the models! Initially, two models were scheduled as the main ones who will be shot at the setup. But other models were very accommodating, filling in the slack time and giving the photogs the challenge of a marathon shoot of so many models in a short span of time. Ashley, one of the members, also went up the stage and showed the group the moves! After about 2 hours of model shoot, talk, and laughter, the party came to a gradual halt.


Watch out for Pat Hocchuan's photos of the party!